How to Host a Ghost Blog in a Subdirectory Instead of a Subdomain
Learn how to move your Ghost blog from a subdomain to a subdirectory to boost SEO and consolidate domain authority. Step-by-step guide using Docker and Cloudflare Workers.


In a previous article, How to Host Multiple Ghost Blogs on a Single Server with Docker and Nginx, we discussed hosting multiple Ghost blogs on the same server. However, there are situations where hosting your blog in a subdirectory (e.g., https://yoursite.com/blog) instead of a subdomain (e.g., https://blog.yoursite.com) is advantageous for SEO.
This guide will show you how to move your Ghost blog to a subdirectory while keeping everything functional. For this example, we will work on one dummy instance, ghost-blog1, and its subdomain, https://blog.mydomain1.com, which we created earlier.
Prerequisites
- You have Ghost installed on subdomains (refer to this article).
- You own the primary domain and use Cloudflare to manage DNS.
Step 1: Update DNS Records in Cloudflare
- Log in to your Cloudflare account.
- Create a new A record:Ensure the Proxied toggle (orange cloud) is set to DNS Only. This is crucial to prevent issues with your setup.
- Name: Set to the desired subdomain, e.g.,
blogforblog.mydomain1.com. - IPv4 Address: Set to the IP address of your server hosting the Ghost blogs.
- Name: Set to the desired subdomain, e.g.,
Step 2: Update Ghost's Configuration
To serve the Ghost blog from a subdirectory, update the url environment variable in your docker-compose.yml file you created earlier:
For ghost-blog1:
ghost-blog1:
  ...
  environment:
    ...
    url: https://blog.mydomain1.com/blog
Restart Docker Containers
Apply the changes by restarting the containers:
docker-compose down
docker-compose up -d
Check the logs to ensure the containers started correctly:
docker-compose logs ghost-blog1Confirm that you can access your blog at: https://blog.mydomain1.com/blog.
Step 3: Set Up a Cloudflare Worker for Reverse Proxy
A Cloudflare Worker will map requests from the subdirectory (e.g., https://mydomain1.com/blog) to the subdomain (e.g., https://blog.mydomain1.com/blog).
Create the Worker
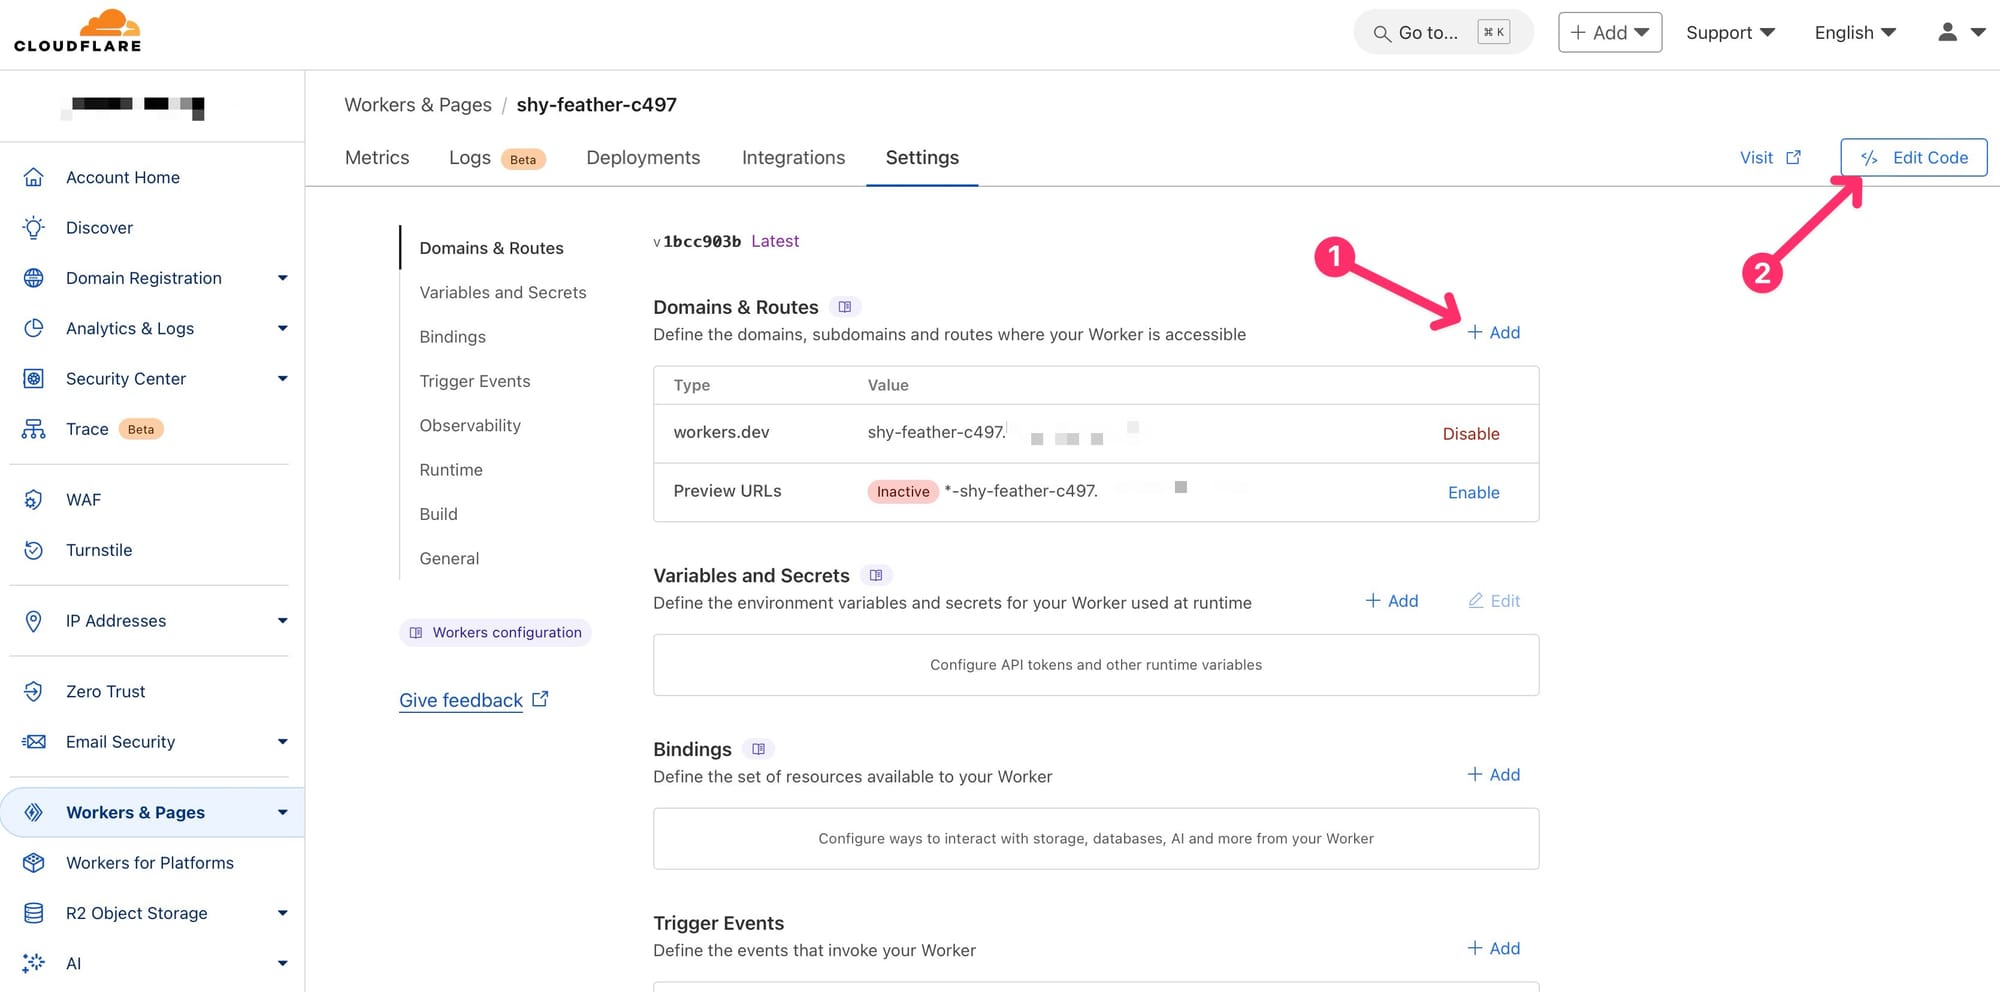
- Go to Cloudflare → Workers & Pages → Create Worker → Create.
- Deploy the default “Hello, World!” Worker and then:
- Navigate to the Settings tab.
- In the Domains & Routes section, add a route like
mydomain1.com/blog*.
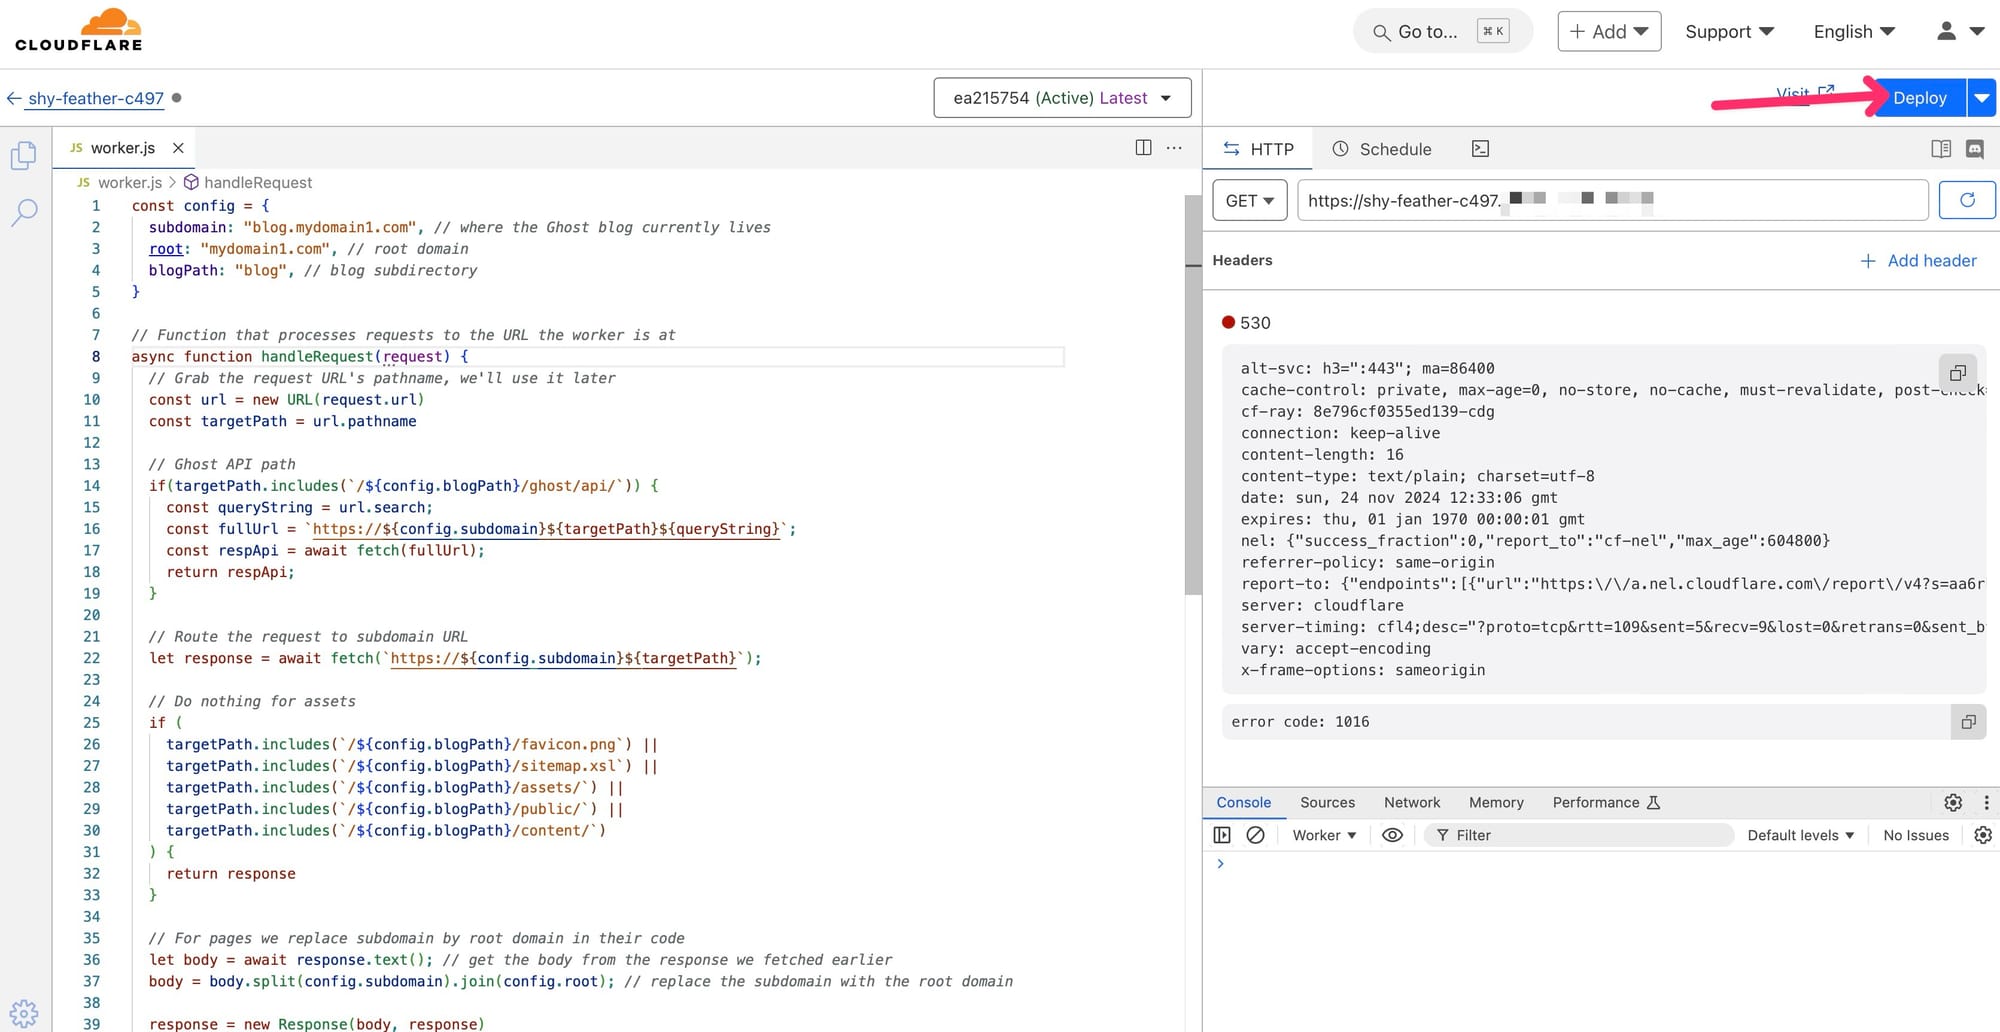
Edit the Worker Code
Replace the default code with the following snippet:
const config = {
  subdomain: "blog.mydomain1.com", // where the Ghost blog currently lives
  root: "mydomain1.com", // root domain
  blogPath: "blog", // blog subdirectory
}

// Function that processes requests to the URL the worker is at
async function handleRequest(request) {
  // Grab the request URL's pathname, we'll use it later
  const url = new URL(request.url)
  const targetPath = url.pathname

  // Ghost API path
  if(targetPath.includes(`/${config.blogPath}/ghost/api/`)) {
    const queryString = url.search;
    const fullUrl = `https://${config.subdomain}${targetPath}${queryString}`;
    const respApi = await fetch(fullUrl);
    return respApi;
  }

  // Route the request to subdomain URL
  let response = await fetch(`https://${config.subdomain}${targetPath}`);

  // Do nothing for assets
  if (
  	targetPath.includes(`/${config.blogPath}/favicon.png`) ||
    targetPath.includes(`/${config.blogPath}/sitemap.xsl`) ||
    targetPath.includes(`/${config.blogPath}/assets/`) ||
    targetPath.includes(`/${config.blogPath}/public/`) ||
    targetPath.includes(`/${config.blogPath}/content/`)
  ) {
    return response
  }

  // For pages we replace subdomain by root domain in their code
  let body = await response.text(); // get the body from the response we fetched earlier
  body = body.split(config.subdomain).join(config.root); // replace the subdomain with the root domain

  response = new Response(body, response)
  return response
}

addEventListener("fetch", (event) => {
  event.respondWith(handleRequest(event.request))
})
Deploy the Worker.
Step 4: Manage Your Blog
The Ghost admin panel remains accessible at the subdomain: https://blog.mydomain1.com/blog/ghost
That's it!
At this point, you should have a working blog at mydomain1.com/blog instead of the subdomain blog.mydomain1.com.
Related articles: